How to Order Corrugated Plastic Signs - 4” x 8” Sheets & Individual Sizes
Here is a simple step-by-step guide for ordering corrugated plastic signs. You will need to be logged in to your account and on the product page you wish to order to begin. We offer two options for these signs: 4” x 8” sheets or Individual Sizes.
Please note: the maximum file size is 100 MB.
Step One: Choose Size and Quantity
- Select the size: 4” x 8” or 8” x 4”.
- Select the quantity.
The flutes are located along the 8” side. Also, please note that any signs 32" x 48" and over or any sign where the H + W is 80 inches or greater will be scored.

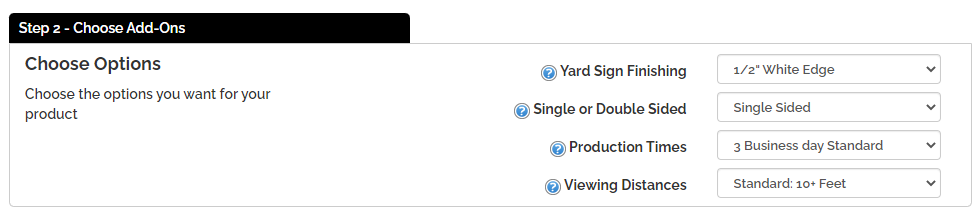
Step Two: Choose Add-Ons
The next step is to select a full bleed or a 1/2 inch margin. You can also select whether you want single sided or double sided signs. If you select double sided signs, the same artwork file will be printed on both sides of the file.
Choose your production time as well as viewing distance.
Step Three: Choose Design Method
The next step is to click on the "Upload a File" button. A popup window will appear. You will be prompted to browse your computer to upload your file.
File types that print the best:
We can also print 300 dpi or higher resolution files:

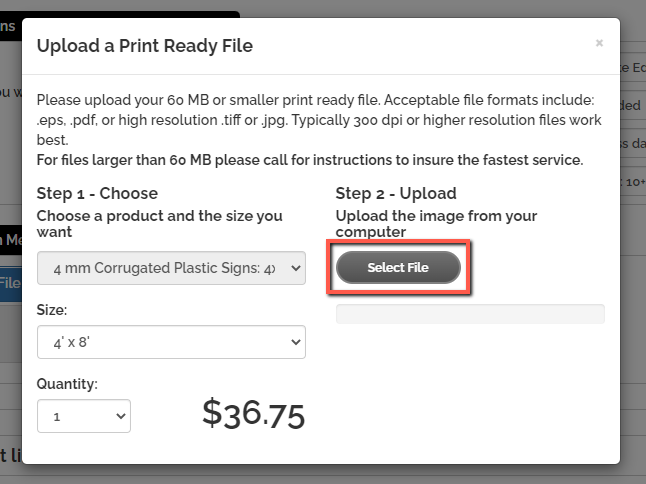
Step Four: Select Your File to Upload
After you click on the “Upload a File” button, a pop up window will appear. Click on the "Select File" button to choose the file from your computer.
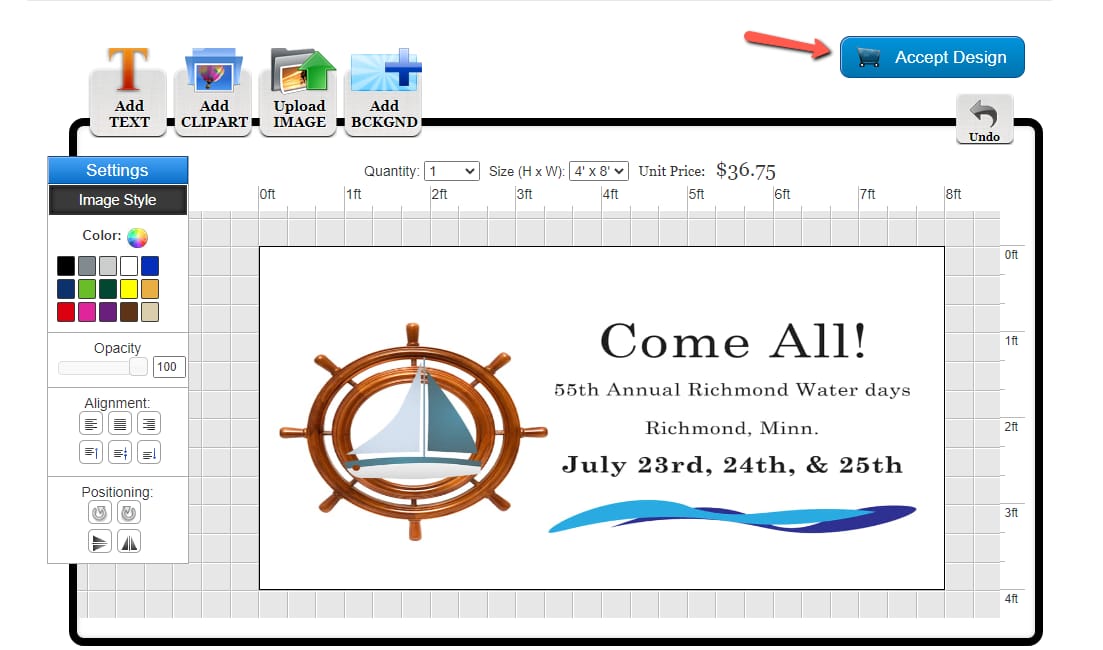
Step Five: Review the File in the Designer
Once your file uploads, it will take you into the online designer. Once you verify that your files look correct, click on the "Accept Design" button. This will take you to the product options page.
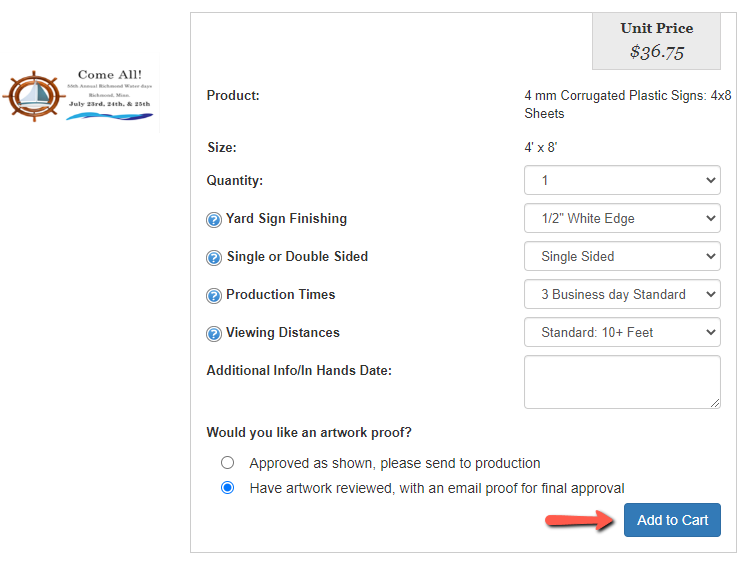
Step Six: Product Options / Additional Proof
You will be taken to the product options page. Review the options to make sure everything is correct. You can also select your production time.
There will be a check box for you to select if you would like to receive an additional proof. If you select this option you will receive an emailed proof from a customer service representative.
You will need to email back an approval before your order will go into production. When you are done, click on the "Add to Cart" button.
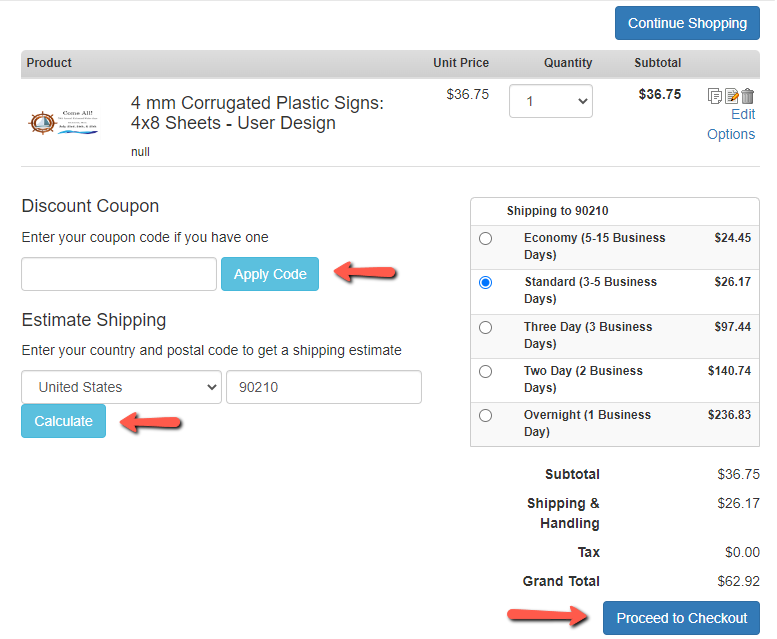
Step Seven: Shopping Cart
You will be taken to the shopping cart for a final review of your order. You can still go back and edit and remove any items in your cart. You can also apply any promotion codes and calculate your shipping rate. When you are done, click on the "Proceed to Checkout" button.
Step Seven: Check Out
You will be taken to the checkout page where you will need to fill in your billing and shipping information. You will also select your payment method. Your billing information should autofill to your account information. If you need to ship to an alternate address, click on the "Ship to different address" button.
You can pay with a credit card or via check. Please note if you pay with a check, your order will not go into production until we receive the check.
You will need to fill in all required fields. Once you have confirmed everything is correct, click on the "Review My Order" button.
Step Eight: Review
You will then be taken to the Order Review Page. You will need to click on the "Approve Designs & Process Order" button. A customer service representative will receive your order. After the files have been reviewed and we’ve received payment we will put your order into production.