How to Place an Order by Uploading a File
All of our products have different sizes and finishing options, so we are using a Vinyl Banner as an example on how to Upload a File:
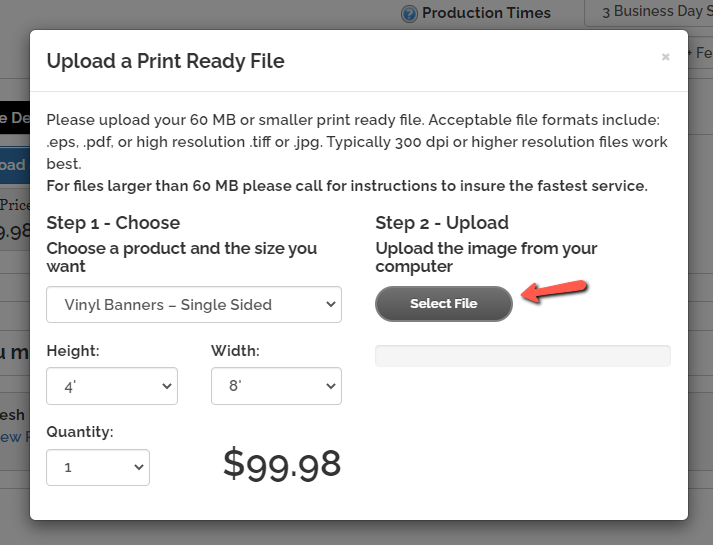
Step 1: Choose the Size and Quantity
There are drop down menus where you will select your product height and width. You will then select the quantity you need. Please keep in mind this is the quantity per artwork file. Each artwork file will need to be designed separately and uploaded separately. PDF files can only be one page.

Step 2: Choose Add-Ons
For our vinyl banner example, you can select hems and grommets, pole pockets, reinforced hems, reinforced corners and single or double sided banners. Some options can not be selected together, like pole pockets and reinforcements. Please see the tooltip options for more details.

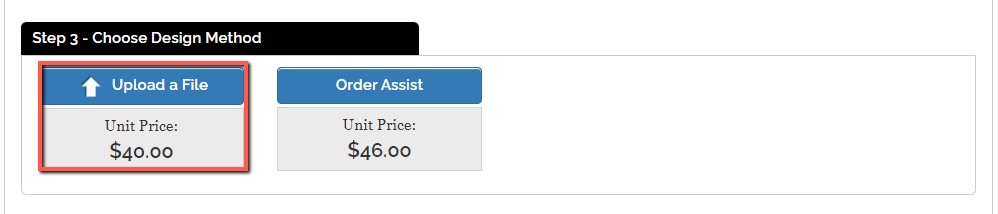
Step 3: Choose the Design Method
In order to upload a file, you will need to click on the "Upload a File" Button. Please note the file limit is 100 MB.
After you click on the button, a pop up window will appear. Click on the "Select Files" button to choose the desired file from your computer.
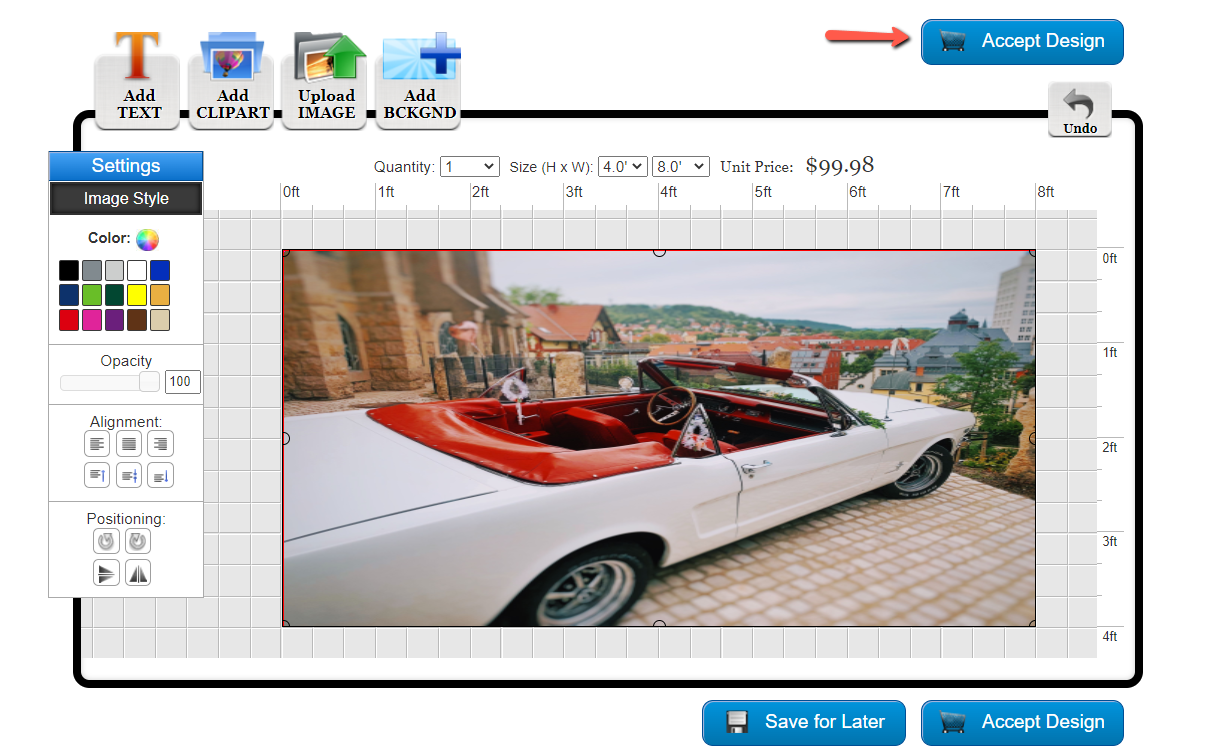
Step 4: Review the File in the Online Designer
Once you select your desired file, it will take you into the online designer. Check your file to make sure the image isn't pixelated. Once you are satisfied with your image, you will need to click on the "Accept Design Button" to proceed.
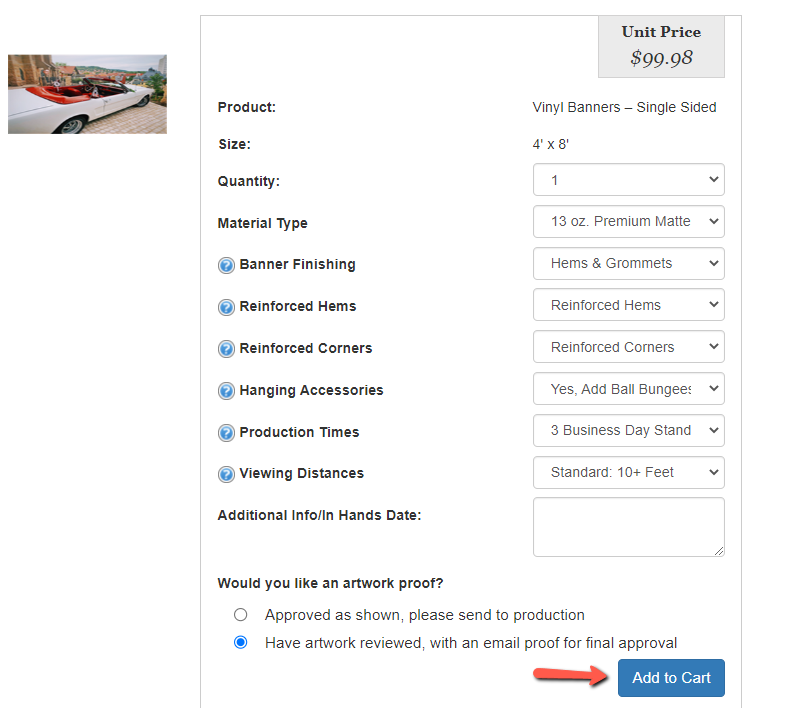
Step 5: Product Options / Additional Proof
You will be taken to the product options page. You will need to review the options to make sure everything is correct. You will also be able to select your production time.
There will be a check box for you to select if you would like to receive an additional proof. If you select this option you will receive an emailed proof from a customer service representative.
You will need to email back an approval before your order will go into production. When you are done, click on the "Add to Cart" button.
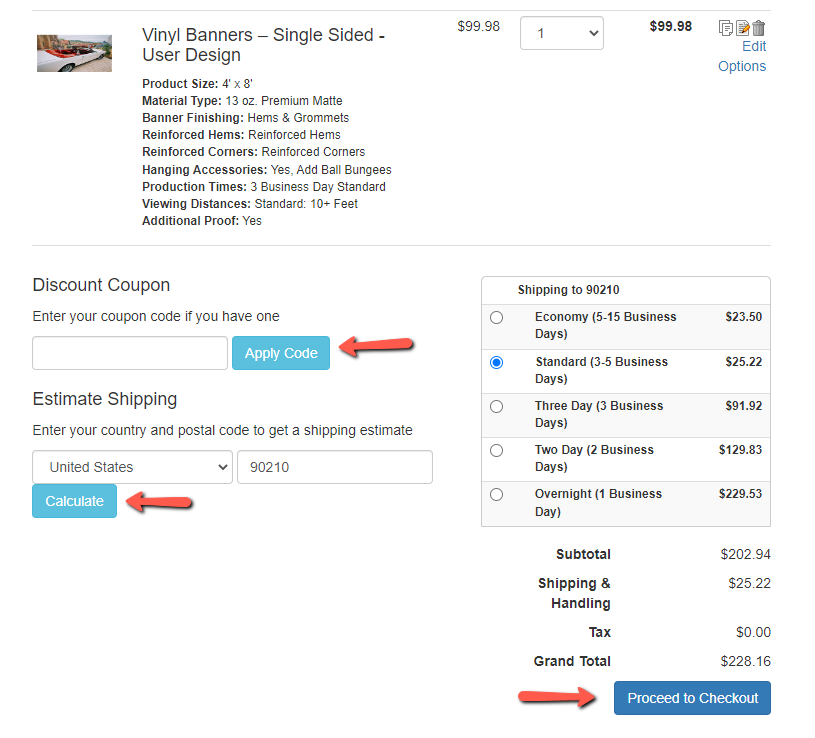
Step 6: Shopping Cart
You will be taken to the shopping cart for a final review of your order. You can still go back and edit / remove any items in your cart. You can apply any promotion codes and calculate your shipping. When you are done, click on the "Proceed to Checkout" button.
Step 7: Checkout
You will be taken to the checkout page where you will need to fill in your billing and shipping information and select your payment method. Your billing information should autofill to your account information. If you need to ship to an alternate address, click on the "Ship to different address" button.
You can pay with a credit card or via check. Please note if you pay with a check, your order will not go into production until we receive the check.
You will need to fill in all required fields. Once you have confirmed everything is correct, click on the "Review My Order" button.
Step 8: Review
You will be taken to the Order Review Page. You will need to click on the "Approve Designs & Process Order" button. A customer service representative will receive your order. After the files have been reviewed and received payment we will put your order into production.